Hellblade: Senua's Sacrifice Review
Ninja Theory's Hellblade: Senua's Sacrifice turns a Pict warrior's descent into psychosis and Norse myth into one of gaming's most unflinching character studies.
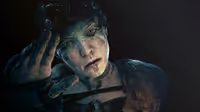
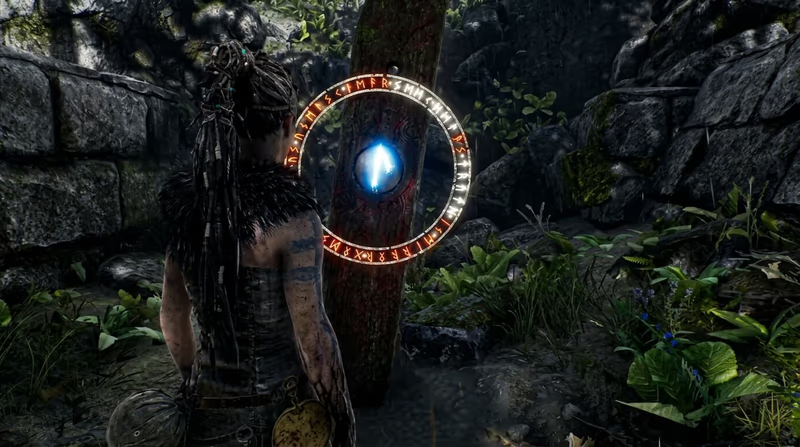
A Lorestone monolith in Hellblade: Senua's Sacrifice. Image: Ninja Theory.
Hellblade only has one collectible category, and Ninja Theory didn't pad it out with filler. The 44 Lorestones, also called Monoliths of Legends, are carved standing stones scattered across every realm Senua crosses, from the fog-choked shores of the opening beach to the fire-blasted plains of Muspelheim. Touch one and Senua's old mentor Druth takes over the narration, breaking from her internal war with the Furies to recite a real fragment of Norse mythology: the binding of Fenrir, the theft of Idun's apples, the death of Baldr. None of it advances the plot directly, and that's the point. Druth's voice is the one steady, external thing in a game built entirely around an unreliable narrator.
Find all 44 before you walk into the final confrontation and the game rewards you with an extended ending scene that isn't available any other way, plus a short epilogue that recontextualizes Senua's entire journey. Miss even one, and the ending plays its shorter, more ambiguous default cut. There's no in-game counter or map marker system, so the only way to know your real-time count is to tally them yourself as you go or lean on the tracking trick below.
Every Lorestone you've already found lights up a circle of runes etched into its base, rendered in a dull, smoldering red. That circle isn't decoration, it's a progress tracker Ninja Theory built directly into the object. The runes fill in in a fixed sequence as you collect stones across the whole game, not just the stones in your current zone.
Hellblade's signature puzzle mechanic reframes Senua's psychosis as the solution instead of the obstacle. Look for wooden portal frames strung with animal skulls, usually goat or deer, planted at odd angles in the environment. Stand in the right spot and look through the skull-frame, and the world behind it visibly warps: walls that blocked your path vanish, staircases that weren't there resolve into existence, bridges fold out across chasms that looked impassable a second earlier.
Shielded enemies are the one combat scenario where button-mashing Senua's sword outright fails. Standard sword strikes bounce off a raised guard and leave you open to a counter, so trying to whittle a shield down with normal attacks just wastes time and HP.
Focus is Hellblade's answer to a slow-motion mechanic, but it's gated behind actual skill rather than a cooldown timer you can just wait out. Landing successful parries and clean combo strings charges the glowing mirror hanging at Senua's hip. Once it's lit, trigger it to slow the world around her to a crawl.
Surtr is the more straightforward of the two optional-order bosses you'll meet early in the story, a towering fire giant fought across a scorched arena where the ground itself periodically erupts. His attacks are heavily telegraphed, favoring wide, slow swings that reward a clean dodge roll rather than a desperate block.
Valravn trades raw physical threat for a fight built entirely around deception, a fitting mirror for a game obsessed with unreliable perception. Expect doubles, vanishing acts, and an arena that actively tries to mislead you about where the real threat is standing.
Fenrir is the spike in Hellblade's difficulty curve, a hulking wolf-shadow that most players rank as the hardest individual fight in the game. He retreats into darkness repeatedly throughout the encounter, and chasing him blindly into the shadows is how most deaths here happen.
The endgame confrontation strips away the one-on-one structure entirely. Senua fights through escalating waves of standard enemies in a two-tiered arena, and killing enough of them summons a shadow onto the second platform, one that reforms into Surtr, Valravn, and Fenrir in sequence, each a shadow-weakened echo of the fight you already survived.
Double back through your rune circles one last time before committing to the final stretch. Once Hela's confrontation begins, Hellblade doesn't let you return to earlier zones, and the extended ending is the single biggest reward this game offers outside the story itself. If your Lorestone count feels uncertain, it's worth replaying the last area you're unsure about rather than risking the shorter cut on a nine-hour game you won't want to immediately restart.

Affiliate link: Support the blog via Instant Gaming at no extra cost.
Hellblade: Senua's Sacrifice
Others Posts
Ninja Theory's Hellblade: Senua's Sacrifice turns a Pict warrior's descent into psychosis and Norse myth into one of gaming's most unflinching character studies.
A survivor's primer for Yamatai: which skills to prioritize, how the salvage economy works, and the base camp habits that keep Lara Croft alive through the island's opening hours.
A beginner's guide to surviving the first 72 hours in the Willamette Parkview Mall: time management, must-do cases, survivor rescue priorities, and early psychopath fights.
A practical starting guide to Resident Evil 3's dodge timing, ammo crafting, and Nemesis encounters, built to get new players through Raccoon City's last night without burning through resources too fast.
A beginner's guide to Mass Effect covering class selection, squad composition, the Paragon/Renegade dialogue wheel, and the early decisions that echo through the rest of the trilogy.
Valve took the tightest puzzle design in the industry, doubled the toolset, added a co-op campaign and two of gaming's best-written characters, and somehow made the sequel better than the original.
Anno 1800 rebuilds the series around the smoke and steel of the second Industrial Revolution, turning supply-chain logistics into the genre's richest city-building puzzle.
An engineering retrospective on the Nintendo Game Boy Color. We explore how a double-speed Sharp SM83 core, a backward-compatible palette-mapped color LCD, and translucent 'Atomic Purple' shells turned a stopgap handheld into the system that carried Pokémon's second generation.

Analysis of the PlayStation 4 and PS4 Pro hardware. We examine the shared CPU bottleneck, the mirrored butterfly GPU design, memory optimizations, and the hardware-level checkerboard rendering that enabled the 4K transition.
games
Techland traded gritty realism for painterly legend in this arcade-shooter retelling of the Old West's most famous gunslingers, bounty hunters, and outlaws.
